
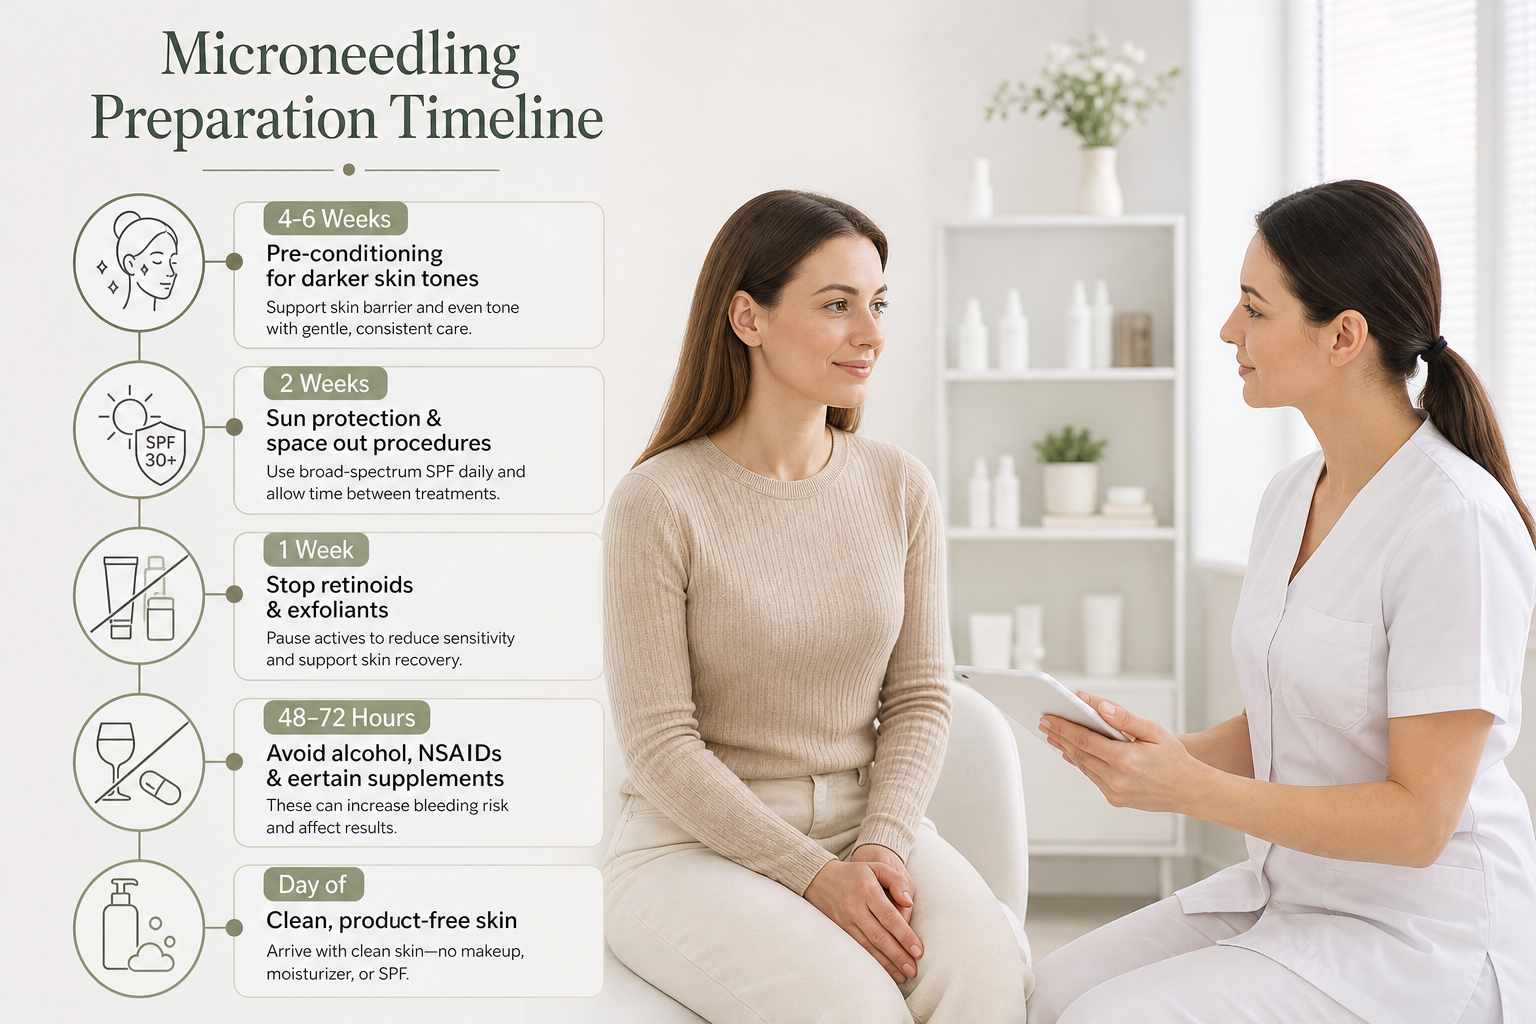

Microneedling — clinically known as collagen induction therapy — works by creating controlled micro-injuries in the skin that trigger the body’s natural repair process, stimulating collagen remodeling and improving texture, tone, and firmness over time. How well that process unfolds depends significantly on what you do in the days and weeks before your appointment. Arriving with compromised, sensitized, or product-laden skin can reduce your results and increase the risk of irritation, prolonged redness, or post-treatment complications. This guide walks you through a practical two-week countdown, explains the reasoning behind each step, and covers the specific preparation needs that most general articles overlook — including supplement avoidance, injectable spacing, and skin-type-specific considerations.
Key Takeaways
- Stop topical retinoids, chemical exfoliants (AHAs/BHAs), and other active skincare products at least five to seven days before treatment — longer if your skin is sensitive.
- Avoid sun exposure, tanning beds, and sunburn for a minimum of two weeks before your session, and arrive with product-free skin on the day.
- Disclose all medications, supplements, and recent procedures to your provider; blood-thinning medications, isotretinoin (Accutane), and a history of herpes simplex virus (HSV) all require specific management before microneedling.
- Patients with darker Fitzpatrick skin types may benefit from a four-to-six-week pre-conditioning regimen to reduce the risk of post-inflammatory hyperpigmentation (PIH).
- Preparation is not just about what to stop — hydration, gentle skincare, and a thorough consultation are equally important for a safe outcome.
Why Preparation Matters for Microneedling
Microneedling creates thousands of micro-channels in the skin’s surface, temporarily disrupting the skin barrier and triggering an inflammatory cascade that drives collagen production. This controlled inflammation is the mechanism behind the treatment’s benefits — but it also means the skin is temporarily more vulnerable to irritation, infection, and pigment changes. Arriving with an already-sensitized or compromised skin barrier amplifies that vulnerability unnecessarily. Conversely, skin that is well-hydrated, free from active irritants, and not recently sun-damaged responds more predictably and recovers more comfortably. Understanding the reasoning behind each preparation step makes it easier to follow through, because the steps are not arbitrary — they directly protect the inflammatory cascade that makes the treatment work.
The Two-Week Countdown: What to Do and When
Four to Six Weeks Before (If Applicable)
Most preparation guides begin at two weeks, but patients with specific concerns benefit from starting earlier. If you have a darker Fitzpatrick skin type (Fitzpatrick IV through VI), your melanocytes are more reactive to inflammation, which raises the risk of post-inflammatory hyperpigmentation (PIH) after microneedling. A four-to-six-week pre-conditioning regimen using tyrosinase-inhibiting topicals — such as tranexamic acid, niacinamide, or kojic acid — can help stabilize melanocyte activity before treatment. These ingredients reduce the likelihood of uneven pigmentation appearing during the healing phase. Discuss this approach with your provider at your consultation; they may also recommend a conservative needle depth for your first session.
This longer preparation window is also relevant if you have recently used isotretinoin (Accutane). Most providers require a minimum of six months after completing an isotretinoin course before performing microneedling, because the medication significantly impairs wound healing and increases the risk of scarring. If you are within that window, your appointment will need to be rescheduled — this is a firm clinical requirement, not a preference.
Two Weeks Before
Two weeks out is when active preparation begins for most patients. The most important steps at this stage involve sun protection and spacing out other procedures. Avoid prolonged sun exposure, tanning beds, and self-tanner during this period. Sunburned or recently tanned skin is already inflamed, and microneedling on top of that inflammation increases the risk of prolonged redness, hyperpigmentation, and discomfort. Apply a broad-spectrum SPF 30 or higher daily, even on overcast days, and reapply if you are outdoors.
If you have had Botox or other botulinum toxin treatments, allow at least two weeks between those injections and your microneedling session. For dermal fillers, the recommended spacing is generally longer — typically four weeks or more — to avoid disrupting filler placement through the mechanical action of the needles. If you have had IPL, laser resurfacing, or a chemical peel recently, discuss the timing with your provider; two weeks is a common minimum, but deeper treatments may require more recovery time before microneedling is appropriate.
If you have a known history of herpes simplex virus (HSV) — including cold sores — inform your provider at this stage. Microneedling can trigger an HSV outbreak in susceptible individuals. Your provider may recommend antiviral prophylaxis, typically starting one to two days before treatment and continuing for several days afterward. This is a straightforward precaution that significantly reduces outbreak risk.
One Week Before
One week before your appointment, begin transitioning your skincare routine toward gentler products. Stop using topical retinoids — including tretinoin, adapalene, tazarotene, and over-the-counter retinol — at least five to seven days before treatment. Retinoids accelerate cell turnover and thin the outer skin layer, which increases sensitivity and the risk of irritation when micro-channels are created. The stronger the retinoid, the earlier you should stop; prescription tretinoin or Retin-A warrants stopping a full week out, while lower-strength retinol products may only need three to five days.
Also stop chemical exfoliants — AHAs such as glycolic acid and lactic acid, and BHAs such as salicylic acid — during this week. These ingredients lower the skin’s surface pH and remove the outer cell layer, leaving skin more reactive. Benzoyl peroxide, hydroquinone, and low-pH vitamin C serums should also be paused. Physical scrubs and exfoliating masks fall into the same category. The goal is to arrive with a skin barrier that is intact and calm, not one that has been recently stripped or sensitized.
Avoid waxing, depilatory creams, electrolysis, and laser hair removal on the treatment area during this week. These methods temporarily disrupt the skin surface and can cause localized inflammation that complicates microneedling.
48 to 72 Hours Before
In the two to three days before your appointment, focus on lifestyle factors that affect skin sensitivity and bleeding risk. Avoid alcohol for at least 24 to 48 hours before treatment. Alcohol is a vasodilator and can increase pinpoint bleeding during the procedure, as well as contributing to dehydration — both of which affect how the skin responds. Strenuous exercise and aerobic activity that causes significant sweating are best avoided for 48 hours before treatment, as elevated body temperature and sweat can irritate already-prepared skin.
Blood-thinning medications and supplements deserve particular attention at this stage. NSAIDs — including ibuprofen (Advil, Motrin), aspirin, and naproxen — increase bleeding tendency and should be avoided for at least 48 hours before treatment unless prescribed for a medical condition you cannot interrupt. Do not stop prescribed medications without speaking to your prescribing doctor first. Supplements with blood-thinning properties — including fish oil, omega-3 fatty acids, and vitamin E — are worth pausing for the same period. These are commonly overlooked but appear consistently in clinical pre-treatment instruction sheets. If you take prescription blood thinners such as warfarin or clopidogrel, discuss this with both your prescribing physician and your microneedling provider well in advance.
Continue drinking adequate water during this period. Well-hydrated skin has better barrier function and tends to respond more comfortably to treatment. You do not need to do anything special — simply maintain normal hydration and avoid excessive caffeine or alcohol that would counteract it.
The Day Before
The day before your appointment, keep your skincare routine minimal. Use a gentle, fragrance-free cleanser and a plain moisturizer — nothing with active ingredients, exfoliants, or fragrances. Get adequate sleep; skin repair processes are more efficient when the body is well-rested, and arriving fatigued can lower your pain threshold during the procedure. Avoid any new skincare products you have not used before, as this is not the time to discover an unexpected reaction.
Day-of Preparation: What to Do the Morning of Your Appointment
On the day of your microneedling session, arrive with clean, product-free skin. Wash your face with a gentle cleanser and do not apply any moisturizer, serum, SPF, or makeup afterward. Your provider will cleanse the skin again before treatment, but arriving without products reduces the risk of introducing irritants into the micro-channels created during the procedure.
Remove contact lenses before your appointment if the treatment area is near the eyes. Leave jewelry at home or be prepared to remove it. Wear loose, comfortable clothing — particularly if the treatment area extends to the neck or décolletage — so that nothing rubs against treated skin afterward.
Most professional microneedling sessions involve the application of a numbing cream (topical anesthetic, typically containing lidocaine) to the treatment area approximately 30 to 45 minutes before the procedure begins. Your provider will apply this at the clinic, so you do not need to apply anything at home beforehand. Arrive a few minutes early to allow time for this step without rushing the numbing period, which directly affects your comfort during treatment.
Eat a light meal before your appointment. Arriving on an empty stomach can make some patients feel lightheaded, particularly if they are anxious about the procedure. If you have concerns about needle anxiety, let your provider know in advance — understanding what to expect (mild pressure, a vibrating sensation, possible pinpoint bleeding, and a sunburn-like feeling afterward) can reduce anticipatory anxiety considerably. The procedure typically takes 30 to 60 minutes depending on the treatment area, and most patients find it tolerable with adequate numbing.
What to Tell Your Provider Before Treatment
A thorough consultation before microneedling is not a formality — it is a clinical screening process that protects your safety. Be prepared to disclose your full current skincare routine, including all active ingredients and prescription topicals. Mention any medications you take, including over-the-counter NSAIDs, supplements, and herbal products. Inform your provider of any recent procedures, including injectables, laser treatments, chemical peels, or other skin interventions, along with the dates.
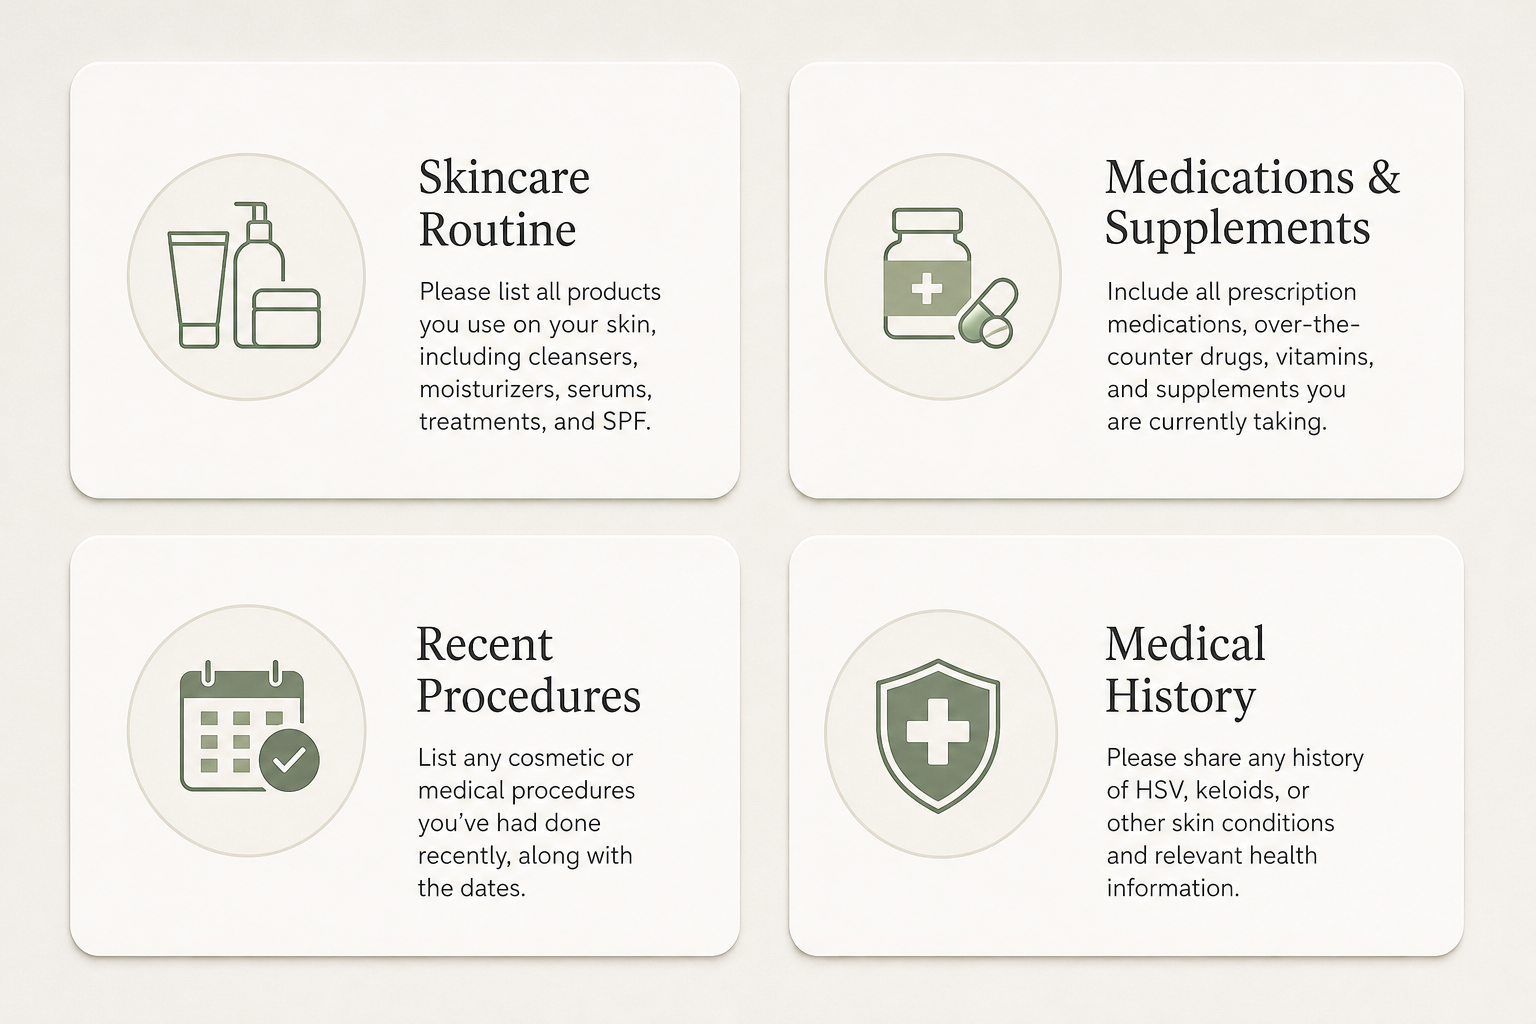
Disclose any history of cold sores or HSV, keloid scarring, or hypertrophic scarring. Patients with a history of keloids may not be suitable candidates for microneedling, as the controlled injury could potentially trigger abnormal scar formation. Also mention any active skin conditions — including eczema, psoriasis, rosacea, or active acne — as these may represent temporary or permanent contraindications depending on their severity and location.
Your provider should also assess your Fitzpatrick skin type as part of the consultation, particularly to determine appropriate needle depth and whether a pre-conditioning regimen is advisable. If you are pregnant or breastfeeding, microneedling is generally not recommended. Immunosuppression, uncontrolled diabetes, and blood clotting disorders are also factors that require careful evaluation before proceeding.
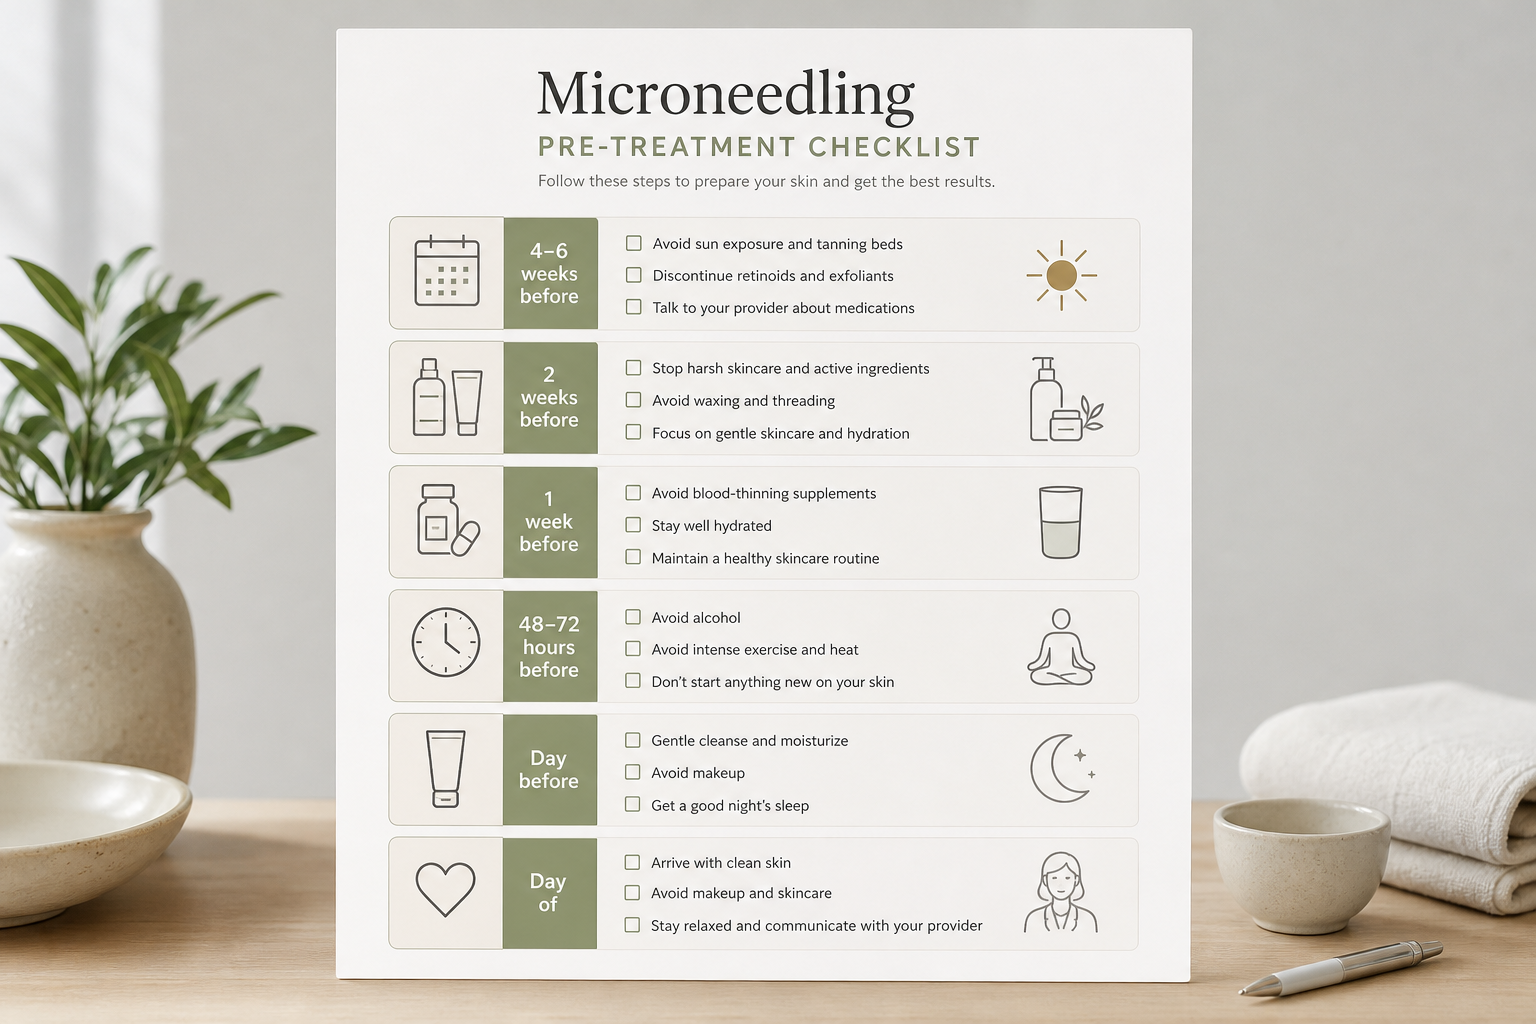
Pre-Treatment Checklist at a Glance
- 4–6 weeks before (if applicable): Begin tranexamic acid or niacinamide pre-conditioning if you have a darker Fitzpatrick skin type; confirm isotretinoin clearance with your provider.
- 2 weeks before: Avoid sun exposure, tanning beds, and self-tanner; apply daily SPF; space out Botox, fillers, IPL, and laser treatments; disclose HSV history and arrange antiviral prophylaxis if needed.
- 1 week before: Stop topical retinoids (tretinoin, adapalene, retinol); stop AHAs, BHAs, benzoyl peroxide, and physical exfoliants; avoid waxing and laser hair removal on the treatment area.
- 48–72 hours before: Avoid alcohol; pause NSAIDs (ibuprofen, aspirin) unless medically necessary; pause fish oil, omega-3, and vitamin E supplements; avoid strenuous exercise; maintain good hydration.
- Day before: Use only a gentle cleanser and plain moisturizer; avoid new products; get adequate sleep.
- Day of: Arrive with clean, product-free skin; no makeup, SPF, or skincare; remove contact lenses and jewelry; eat a light meal beforehand; arrive early for numbing cream application.
At-Home Microneedling vs. Professional Treatment: Different Preparation Standards
At-home microneedling devices — typically dermarollers with needle lengths of 0.2 to 0.5 mm — are a different category from professional microneedling performed with medical-grade devices at greater depths. The skincare avoidance principles (retinoids, AHAs/BHAs, sun exposure) apply to both, but at-home use carries additional considerations that professional settings handle automatically. Device sterilization is critical: at-home rollers must be cleaned with isopropyl alcohol before and after each use and replaced regularly, as dull or contaminated needles increase infection risk and cause unnecessary skin trauma. Professional devices use sterile, single-use needle cartridges that eliminate this variable entirely.
At-home devices are not appropriate for treating active acne, open wounds, or inflamed skin, and they should never be used on areas with suspicious lesions. If you are considering at-home microneedling, the same consultation principle applies — speaking with a qualified practitioner before starting helps you understand whether the approach is appropriate for your skin concerns and Fitzpatrick skin type, and what realistic outcomes to expect from lower-depth devices compared to professional treatment.
Frequently Asked Questions
How long before microneedling should I stop retinol?
Stop over-the-counter retinol products at least three to five days before your appointment. Prescription-strength retinoids such as tretinoin or adapalene should be stopped five to seven days before. The stronger the retinoid, the earlier you should pause it. Your provider may advise a longer break if your skin is particularly sensitive or reactive.
Can I drink alcohol before microneedling?
Avoid alcohol for at least 24 to 48 hours before your session. Alcohol dilates blood vessels, which can increase pinpoint bleeding during treatment, and it contributes to dehydration that affects how your skin responds and recovers. A single drink the night before is unlikely to cause a serious problem, but abstaining for two days is the safer approach.
Can I take ibuprofen or paracetamol for pain before my appointment?
Avoid ibuprofen, aspirin, and other NSAIDs for at least 48 hours before microneedling, as these medications thin the blood and can increase bleeding during the procedure. Paracetamol (acetaminophen) does not have the same blood-thinning effect and is generally considered acceptable if you need pain relief before your appointment, but confirm this with your provider. Do not stop any prescribed medication without speaking to your doctor first.
Should I apply numbing cream at home before arriving?
In most cases, no. Your provider will apply a topical anesthetic at the clinic approximately 30 to 45 minutes before treatment begins. Applying numbing cream at home without guidance can result in uneven absorption, and some formulations are not appropriate for self-application over large areas. Arrive a few minutes early so the numbing process is not rushed.
Can I wear makeup to my microneedling appointment?
No. Arrive with completely clean, product-free skin. Makeup, SPF, and skincare products should not be on the skin when micro-channels are created, as they can be pushed into the skin and cause irritation or infection. Your provider will cleanse the skin before treatment, but starting with a clean face reduces the risk of residue remaining.
I get cold sores occasionally. Is microneedling safe for me?
Microneedling can trigger a herpes simplex virus (HSV) outbreak in people who carry the virus, even if you have not had a cold sore in years. Inform your provider before your appointment. Antiviral prophylaxis — typically an oral antiviral medication started one to two days before treatment — is a standard precaution in this situation and significantly reduces outbreak risk. This does not necessarily mean you cannot have microneedling; it means the treatment requires appropriate preparation.
How soon after Botox can I have microneedling?
A general guideline is to wait at least two weeks after botulinum toxin injections before having microneedling in the same area. For dermal fillers, the recommended gap is typically four weeks or longer. These intervals allow the injectables to settle fully and reduce the risk of the microneedling procedure affecting filler placement or botulinum toxin distribution. Always confirm the specific timing with the provider who performed your injectables.
Making the Most of Your Microneedling Session
Microneedling preparation is not complicated, but it does require planning — particularly if you use prescription skincare, take regular medications or supplements, have a history of HSV, or have a darker skin tone that benefits from pre-conditioning. The two-week countdown covers the essentials for most patients, while the four-to-six-week window addresses the specific needs of those at higher risk of post-inflammatory hyperpigmentation or with recent isotretinoin use.
Following your pre-treatment checklist carefully gives the collagen induction process the best possible environment to work in — intact skin barrier, no competing inflammatory triggers, and a treatment surface free from active ingredients that could cause unpredictable reactions when micro-channels are open. If you are unsure about any step, or if your skincare routine includes prescription products, discuss the specifics with your provider at your consultation rather than making assumptions. A qualified practitioner can tailor the preparation timeline to your individual skin history, current routine, and treatment goals, which is always more reliable than a generic checklist alone.
